 Help Center
NEW: We are now offering professional monitoring services in Canada:
https://www.osigodirect.com/get-pro-monitoring/
Or see information below for for self monitoring:
Self Monitoring with or without a sim card. (see information below):
* The instructions below are specifically for self monitoring and not part of our Professional Monitoring services.
Please note that there is no extra charge to activate a sim card that you purchase from one of the cell providers that we recommend in the article. All you would need to do is install the sim from your cell provider and follow the instructions below.
Do I have to install a SIM Card in the Gen 2 alarm system?
You do not need to install a SIM card into the Gen 2, as you can connect it to the Smart Life app via Wi-Fi. When you leave your home or small business, as long as the Gen 2 is connected to Wi-Fi, you will still receive app notifications on your mobile device using your phone's cellular data plan.
A SIM card adds an extra layer of security in case of a Wi-Fi disconnection from your ISP (Internet Service Provider).
A SIM card is also useful for customers who live in remote areas or have a cabin without internet access.* Please note that SIM cards are not included with the Gen 2 Alarm System.
Can the Alarm Panel send an SMS message or Call if I am out of the country?
Yes, the alarm panel can send alarm notifications to your registered phone number even if you are away from the country. As long as the SIM card used in the panel can make calls or send SMS messages, and your personal cell phone can receive them internationally.
-
Important Note:
-
Roaming charges may apply depending on your phone plan.
-
The SIM card in the alarm panel should also support international dialing.
-
Which SIM Card to Use:
-
In Canada: We recommend using a SIM card from Chatr (a sister company of Fido/Rogers). The testing we performed using he Chatr SIM had the best results.
- In the USA: We recommend using a SIM card from either SpeedTalk mobile, T-Mobile or Tello SIM card network (a division of T-Mobile).
- In UK: We recommend using a SIM card from giffgaff
- In South America: We recommend using a SIM card from Movistar
Which Plan to Choose:
You do not need a data plan. A basic Talk/Text plan is sufficient for the Gen 2.
Installing the SIM Card:
Important: Please ensure to power off the Gen 2 Alarm Panel before you insert the Sim Card into the sim card tray. Unplug the power adapter and turn the back up battery switch to the off position.
Inserting the Nano Sim Card into the sim card try: Video 1 & Video 2
On the right side of the SIM card Tray, you will see arrows that point in the direction to Open or Lock the tray.
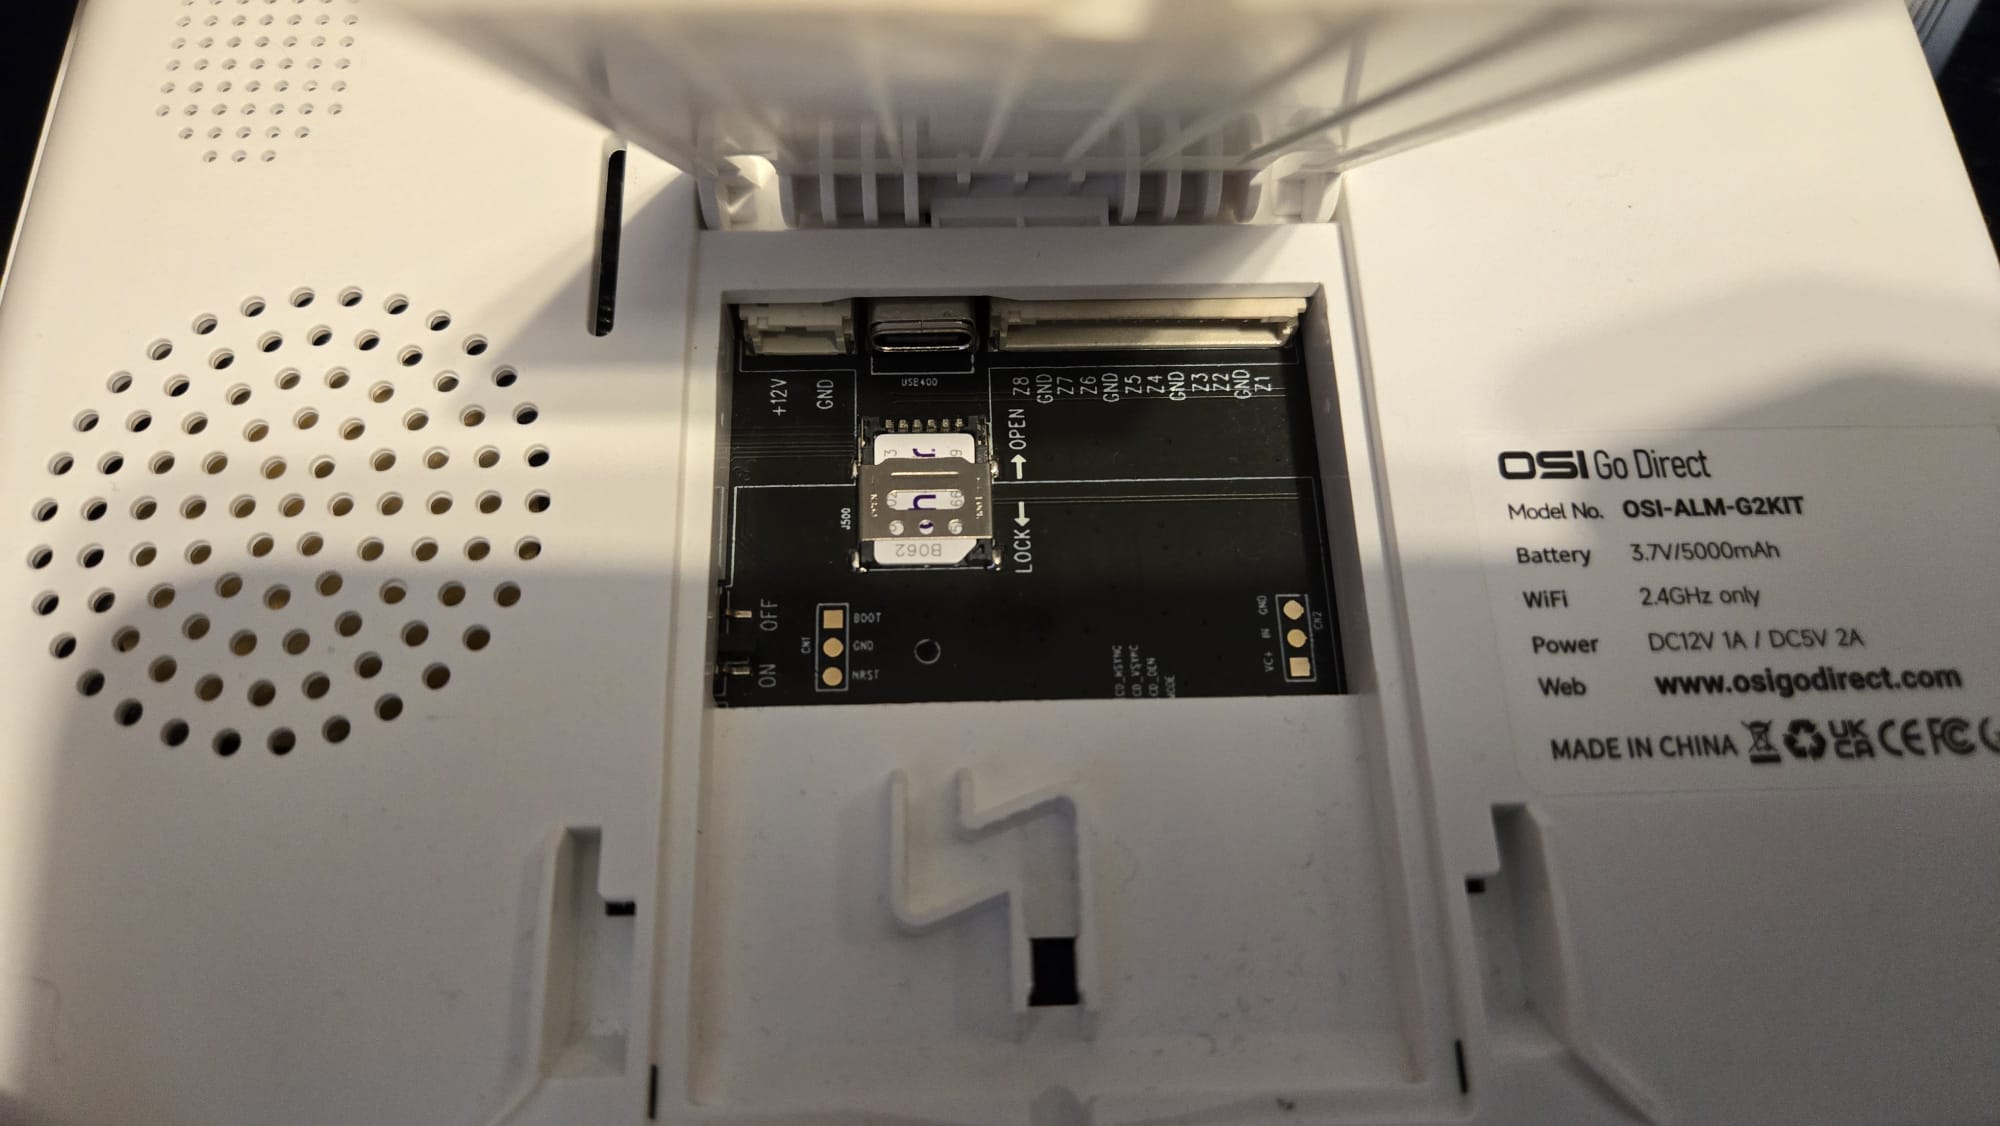
1. Push the SIM Card tray locking mechanism forward to unlock the tray.
2. Lift up the SIM Card tray locking mechanism
3. Set the Sim card into the SIM card tray holder, ensuring the cut edge of the sim is on the bottom right side.
4. Put down the SIM card try locking mechanism down on the SIM card
5. Pull the SIM card locking mechanism towards you to lock the Sim card into place. You will hear a slight click.
6. Turn the backup battery back on
7. Plug the Gen 2 power adapter back into the wall.
8. Within 30 to 60 seconds you should see the cell bars turn a solid white.
Alarm Panel Sim Modual specifications:
SIMCom A7670G communication module designed for global 4G connectivity, supporting LTE Cat 1 with uplink speeds up to 5 Mbps and downlink speeds up to 10 Mbps.
Supported Frequency Bands:
- LTE-TDD: Bands B38, B39, B40, B41
- LTE-FDD: Bands B1, B2, B3, B4, B5, B7, B8, B12, B13, B18, B19, B20, B25, B26, B28, B66
- GSM: 850, 900, 1800, 1900 MHz
These bands ensure compatibility across various global regions and network operators.
How to Program phone numbers into the alarm panel and turn on the SMS and Phone options: Click Here for Video
Phone Dial Interface
Phone Numbers

Setup Example
According to your preference, please enable the corresponding: Phone icon (to receive a call from the alarm panel) or
 SMS icon (to receive an SMS message according to your needs
Important information about enabling the 'Phone' option
Very Important: If the ‘Phone’ option is enabled, we have noted that if the first number on the list does not answer and voicemail picks up, the alarm panel will leave a message. However, the panel will not hang up until your voicemail time limit runs out (typically 2 to 5 minutes). We want to ensure that our customers are aware of this drawback. If you decide to enable the ‘Phone’ option, it is important to answer calls right away. Please note that you as long as your SMS option is enabled you will always receive an SMS message when an ‘Alarm Event’ occurs.
Additional notes:
Unfortunately, this is a limitation of how alarm panels make phone calls—they can’t detect whether they’re talking to a person or voicemail, so they stay connected until the voicemail system hangs up.
Here are some possible workarounds:
-
Rely on SMS notifications instead of phone calls – SMS messages are instant, and you’ll always get them even if your voicemail picks up.
-
Use monitoring services – A professional central monitoring station can handle calls to multiple contacts quickly.
-
Set voicemail to a shorter limit (if your carrier allows it) – This reduces the delay before the panel moves on to the next contact.
-
Reorder your call list – Put the number most likely to answer first, so it’s less likely to hit voicemail.
1) Phone Number Format: Important update: Please enter the phone number into the alarm panel like this: 1 + Area Code + Local Number. Example: 15552301234
2) SMS/Phone Alarm Rules: After the alarm is triggered, the security panel will send SMS messages in the order of the set numbers.
3) Arming or Disarming Alarm Panel by using SMS Commands.
The SMS commands and panel actions were taken are as below:


The panel will reply with a message to confirm the command is executed successfully.
NOTE: The panel only accepts SMS commands from the phone numbers that you have added to the alarm panel. (Menu-->Phone-->Settings), the SMS commands sent by any other mobile numbers will be not recognized and no action will be taken.
Example below:
Note that the number below <0987051> indicates the serial number of the Alarm Panel
Click Here for Video of SMS messages and a phone call being received when the Gen 2 Alarm System is Armed/Disarmed and a Sensor is triggered.

