 Help Center
If a door or window equipped with an entry sensor is left open when you attempt to arm your OSI Gen 2 Alarm System, the alarm panel will indicate that not all entries are closed.
If you have several entry sensors installed, you can use the methods below to determine which door or window is currently open.
Identifying an Open Sensor When Arming
When you attempt to arm the Gen 2 Alarm Panel while an entry sensor is open, the touchscreen will indicate that one or more entries are not closed.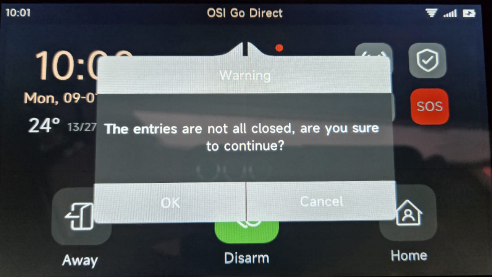
You can check which entry sensor is open directly from the alarm panel before proceeding with arming.
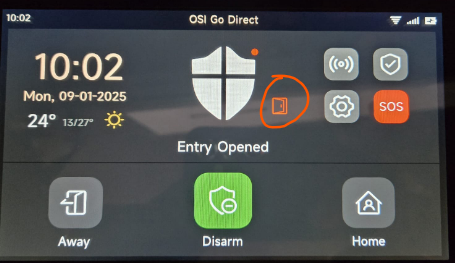
If the system is armed while an entry sensor remains open, the Gen 2 can bypass the open sensor so that the remaining closed sensors continue to protect the premises.
For more information, see:
Sensor Bypass Explained: Keeping Your Alarm Active with Open Doors or Windows
Check Your Mobile App Notifications
The Gen 2 mobile app can also send a notification identifying the entry sensor that is open.
For this feature to be most useful, we recommend giving each entry sensor a descriptive name based on its location, such as:
-
Front Door
-
Back Door
-
Kitchen Window
-
Living Room Window
-
Garage Entry Door
-
Basement Window
This makes it much easier to immediately determine which entry requires attention.
Check Sensor Status in the Accessories Menu
You can also view the current status of your entry sensors through the Accessories Menu in the Gen 2 mobile app.
The Accessories Menu allows you to see which sensors are shown as open and which are closed.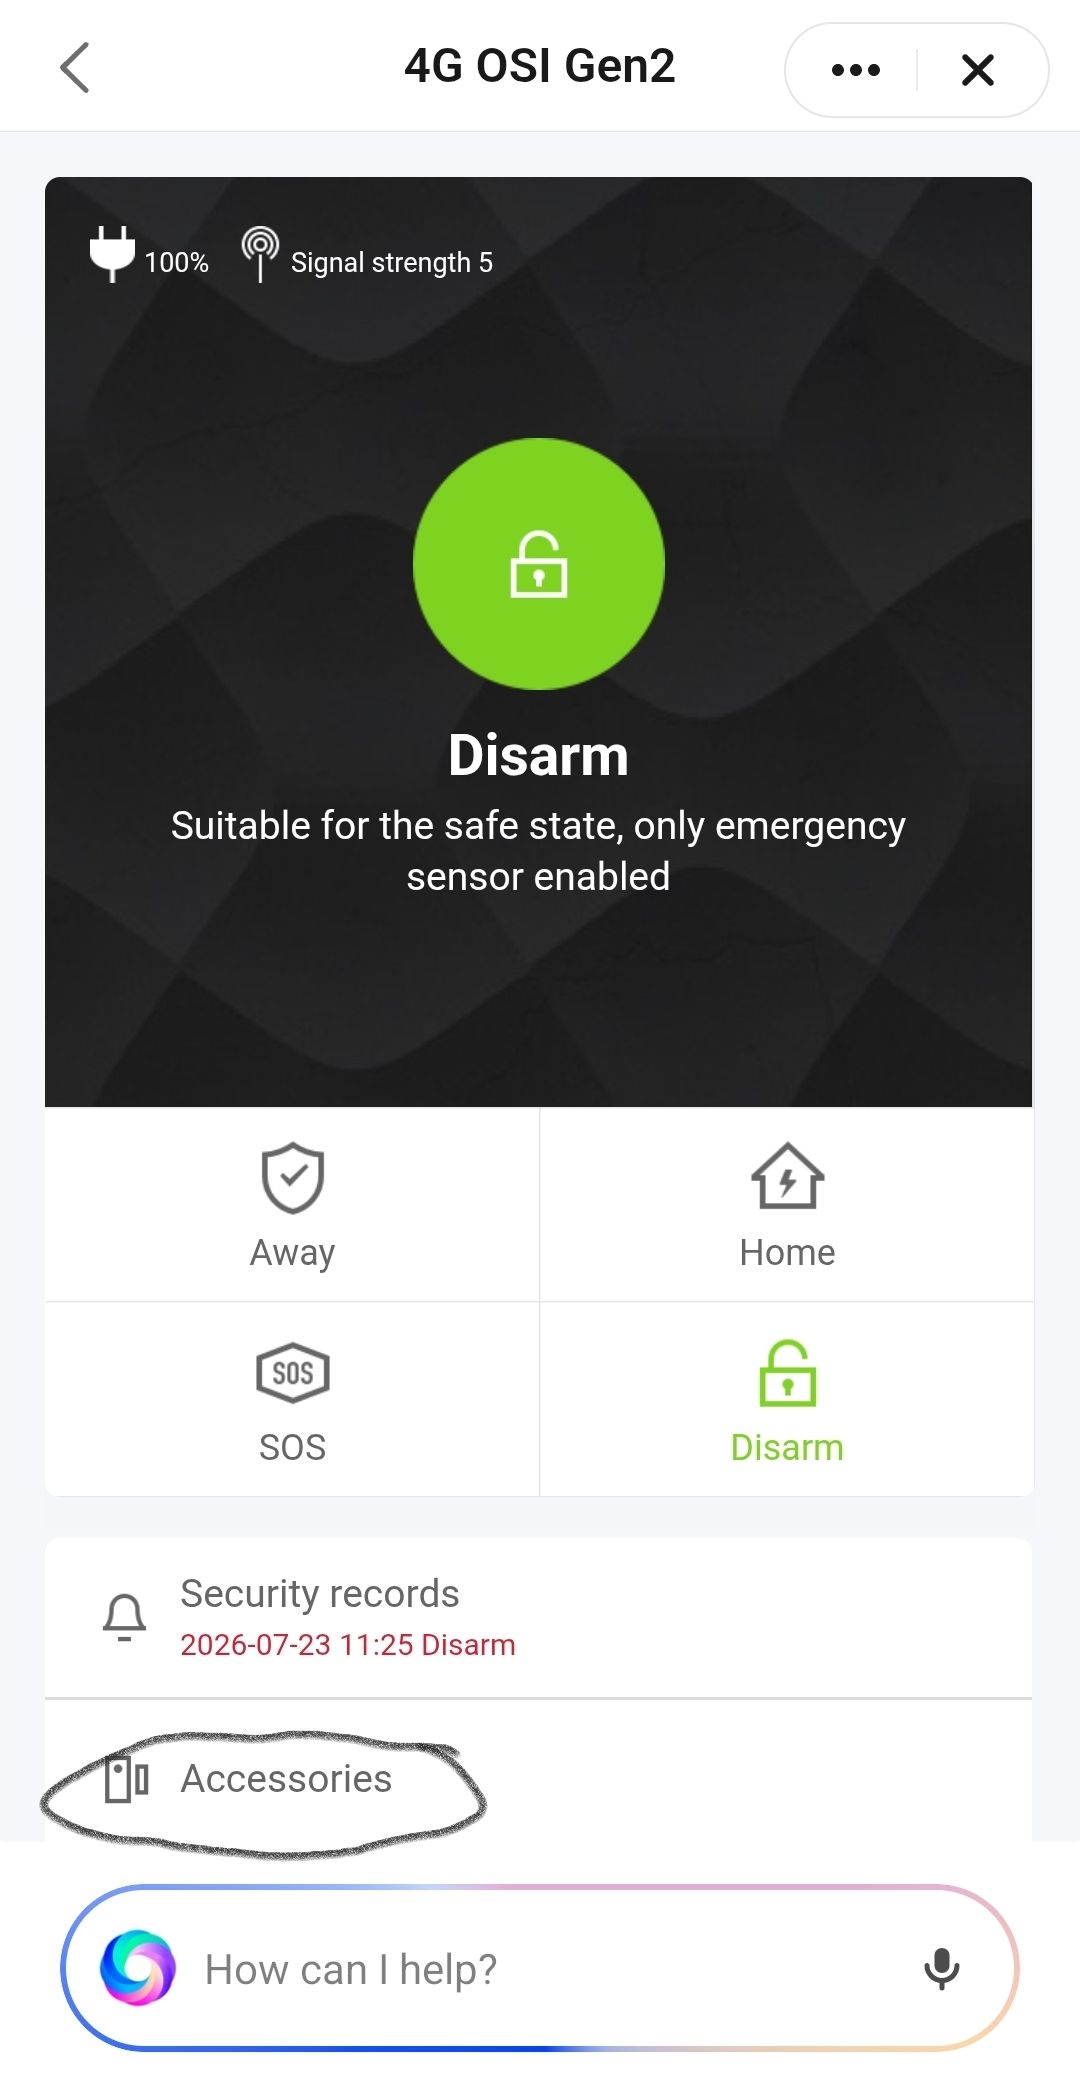
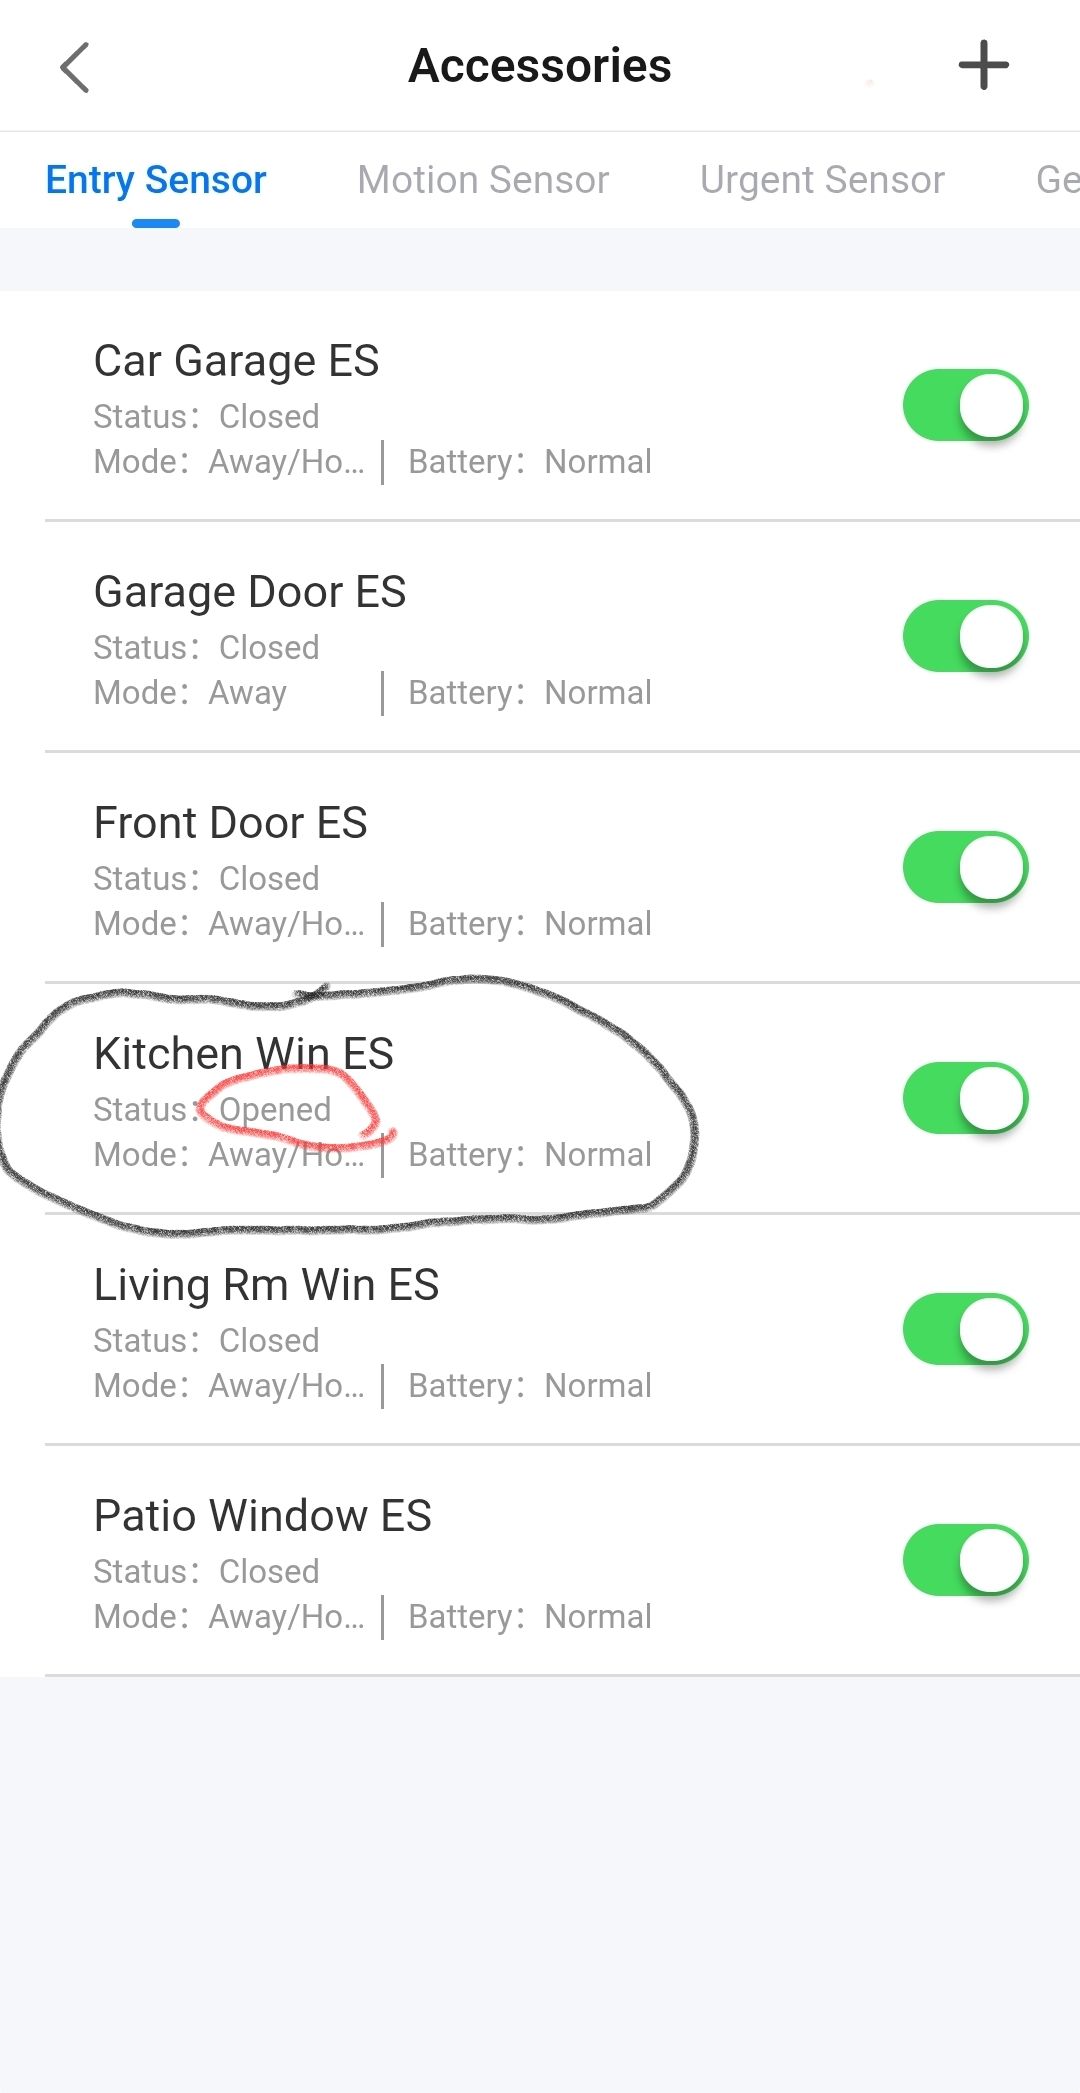
Important: Refreshing the Sensor Status
If you are testing your entry sensors, the Accessories Menu may need to be refreshed before it displays the latest status.
For example, if an entry sensor currently shows as closed and you open the corresponding door or window:
-
Open the Accessories Menu and note the current sensor status.
-
Open the door or window you wish to test.
-
Exit the Accessories Menu.
-
Return to the Accessories Menu.
-
Check the sensor status again.
The sensor that was previously closed should now display as open.
Rename Your Entry Sensors
We strongly recommend assigning a unique, descriptive name to every entry sensor.
Entry sensors can be named when they are added to the Gen 2 Alarm Panel and can also be renamed through the mobile app.
Instead of leaving sensors with generic names, assigning the actual location makes identifying an open door or window much easier.
For instructions, see:
How to Add an Entry Sensor to the Gen 2 Alarm Panel
https://osigodirect.kb.help/how-add-an-entry-sensor-to-the-gen-2-alarm-panel/
Quick Summary
If your Gen 2 reports that entries are not all closed:
-
Check the alarm panel to determine which entry sensor is open.
-
Check the notification sent by the Gen 2 mobile app.
-
Open the Accessories Menu in the app to view sensor status.
-
If testing a sensor, exit and reopen the Accessories Menu to refresh its status.
-
Give every sensor a descriptive location-based name so it can be easily identified.
These features allow you to identify an open entry sensor while ensuring that the remaining closed entry sensors can continue protecting your premises.