 Help Center
Title: Dealing with Tight Door Frames and Sensor Magnet Placement – Solutions for Common Installation Challenges
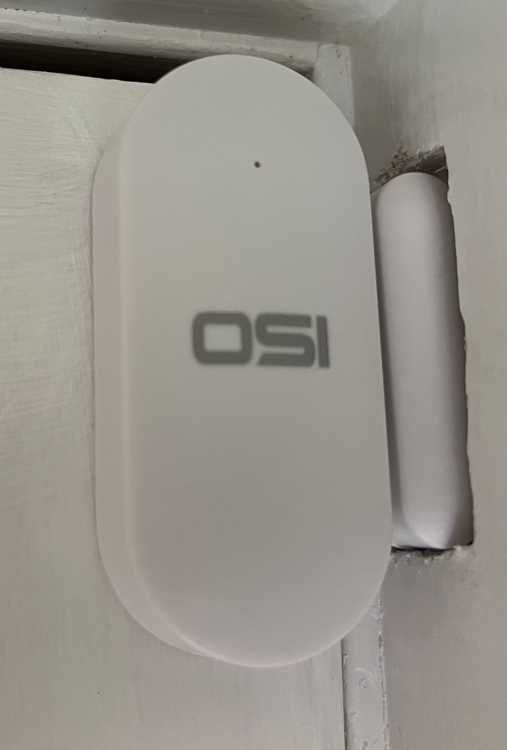
When installing door/window contact sensors, one of the most common issues customers face is finding a proper placement for the magnet component—especially when door frames have thick molding or narrow clearances. A frequent scenario involves the magnet being struck by the door when it opens, as shown in the image highlighted with a red circle. This can lead to unreliable sensor performance, physical damage to the magnet, or the door not closing properly.
To help others facing similar challenges, we've compiled real-world examples from customers who found creative solutions to mount their OSI sensor magnets in tight or awkward locations. Each example demonstrates how to adapt your installation based on your door’s layout, molding depth, and clearance.
🔴 Problem: Magnet Gets Hit When Door Opens

In this setup, the magnet is mounted on the frame, but it protrudes far enough to make contact with the door when opened. This can cause the magnet to dislodge over time or interfere with normal door operation. This is a common issue when the molding is thicker than the gap between the door and the frame.
✅ Solution 1: Use a Flat, Low-Profile Magnet

Here, the user mounted the sensor on the door and used a much slimmer magnet on the frame. This low-profile magnet avoids protrusion and allows the door to open freely without making contact. It’s a great solution when your molding is shallow or flush with the door.
✅ Solution 2: Mount Sensor on the Door , Magnet on the Frame

In this installation, the OSI sensor is placed on the door itself, and the magnet is mounted to the door frame . This reversed arrangement can be a smart option when the frame provides more surface area than the door or when reversing the sensor and magnet helps achieve better alignment.
✅ Solution 3: Recessed Magnet Installation
* Please note that the sensor shown below is from our previous Gen 1 system; however, the principle is the same.
This customer created a recessed pocket in the frame to install the magnet flush with the surface. Recessing the magnet prevents it from sticking out and being hit by the door, while maintaining strong alignment with the sensor. This approach requires some light woodworking or carving, but results in a clean, secure fit.
✅ Solution 4: Top-Mounted Sensor and Magnet

Another method is mounting the sensor and a magnet on the top edge of the door and frame. This works well when there's not enough space on the sides or if the side molding is uneven. Just ensure the magnet and sensor remain within the detection range (typically a 15–20 mm gap).
🧲 Understanding the Gen 2 Magnet Housing

Here’s a look at the inside of the OSI magnet housing. The cylindrical metal piece is the actual magnet, and it can be removed and embedded directly into a custom frame or alternate mount if needed. This allows a more compact and tailored installations.
💡 Tips for Successful Installation
-
Always test the sensor and magnet alignment before final mounting.
-
Ensure the distance between magnet and sensor is within the specified range when the door is closed.
-
If needed, use double-sided tape temporarily to test placement before drilling or screwing.
-
Use flush-mount or recessed magnets in high-traffic or tight-clearance doors.
Conclusion
Installing contact sensors in homes with non-standard door frames or prominent molding doesn't have to be a headache. With a bit of creativity and the right type of magnet or placement technique, you can ensure a clean, functional setup. We hope these real-world examples help you find the best fit for your space.
If you’ve used a different technique or need help with your installation, feel free to reach out—we’re happy to help!